AWS
Porter uses EKS Pod Identity to associate an IAM role with a service’s pod. Your application code can then use the default AWS SDK credential chain (e.g.DefaultAWSCredentialsProviderChain in Java, aws.config.LoadDefaultConfig in Go, boto3.Session() in Python) and credentials will be resolved automatically — no access keys, no sts:AssumeRole calls in application code.
How it works
When you attach an IAM role to a service, Porter creates an EKS Pod Identity Association on your cluster that maps the service’s Kubernetes service account to the IAM role you specify. At runtime, the EKS Pod Identity agent injects short-lived credentials for that role into the pod. You are responsible for creating the IAM role and granting it the permissions it needs. Porter does not create the role or modify its permissions.Step 1 — Create the IAM role
In your AWS account, create a new IAM role with two things:-
A trust policy that allows EKS Pod Identity to assume the role:
- A permissions policy scoped to only the AWS APIs and resources your service needs.
Resource: "*", and create a dedicated role per service rather than sharing roles across workloads.
Step 2 — Attach the role to your service
In the Porter dashboard, open the service you want to grant access to and scroll to the IAM Role Connection section. Toggle the connection on and enter the IAM role name or full ARN: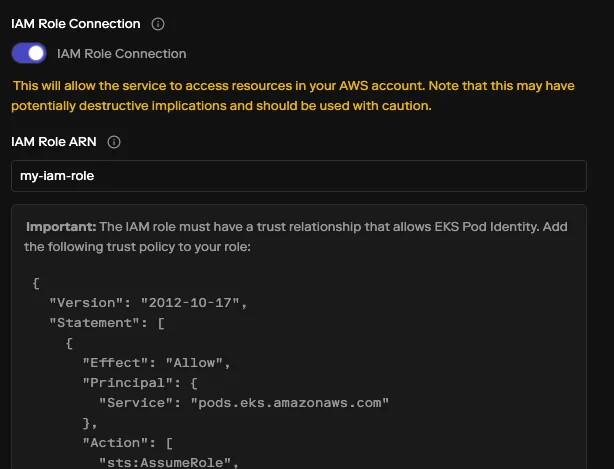
Configure as code (porter.yaml)
Configure as code (porter.yaml)
If you manage your app config as code, you can declare the same connection in See Connections in porter.yaml for the full schema.
porter.yaml:Azure
Porter uses Azure Workload Identity to federate a service’s Kubernetes service account with a User Assigned Managed Identity (UAMI) in your Azure subscription. Your application code can then useDefaultAzureCredential (or any credential type that supports workload identity) and Azure will issue tokens for the UAMI on the pod’s behalf.
How it works
When you attach a managed identity to a service, Porter creates a federated identity credential on the UAMI you specify. The credential trusts the AKS cluster’s OIDC issuer to vouch for a specific Kubernetes service account. At runtime, the pod presents a projected OIDC token and Azure exchanges it for an access token scoped to the UAMI. You are responsible for creating the UAMI and granting it role assignments. Porter does not create the UAMI or modify its permissions.Step 1 — Create a User Assigned Managed Identity
In the same Azure subscription as your AKS cluster, create a User Assigned Managed Identity and grant it the Azure RBAC role assignments needed to access the specific resources your service will call. We strongly recommend following the principle of least privilege: scope role assignments to individual resources rather than resource groups or subscriptions, prefer narrow data-plane roles (e.g.Storage Blob Data Reader) over broad roles like Contributor, and create a dedicated UAMI per service.
You don’t need to add any federated credentials yourself — Porter creates the one mapping your service’s Kubernetes service account to this identity on the next deploy.
Step 2 — Attach the identity to your service
In the Porter dashboard, open the service you want to grant access to and scroll to the Azure Managed Identity Connection section. Toggle the connection on and enter the managed identity name and resource group:
DefaultAzureCredential from the Azure SDK and Azure will resolve credentials automatically — no client secrets, no certificates.
Configure as code (porter.yaml)
Configure as code (porter.yaml)
If you manage your app config as code, you can declare the same connection in See Connections in porter.yaml for the full schema.
porter.yaml:GCP
Porter can bind a service to a GCP IAM service account in your project. Your application code can then use Application Default Credentials (e.g.google.auth.default() in Python, google.NewClient in Go, GoogleCredentials.getApplicationDefault() in Java), and GCP will issue tokens for the bound IAM service account.
How it works
When you attach a GCP IAM service account to a service, Porter configures the required IAM binding so the service can receive short-lived credentials scoped to the IAM service account. You are responsible for creating the IAM service account and granting it the IAM roles it needs. Porter does not create the service account or modify its project-level permissions.Step 1 — Create a GCP IAM service account
In the same GCP project as your Porter infrastructure, create an IAM service account and grant it only the IAM roles needed to access the specific resources your service will call. We strongly recommend following the principle of least privilege: prefer narrow predefined roles (e.g.roles/storage.objectViewer on a single bucket) over broad roles like roles/editor, scope role bindings to individual resources rather than the project, and create a dedicated service account per Porter service.
You don’t need to add the service identity binding yourself — Porter adds it on the next deploy.
Step 2 — Attach the service account to your service
In the Porter dashboard, open the service you want to grant access to and scroll to the GCP Service Account Connection section. Toggle the connection on and enter the fully-qualified service account email: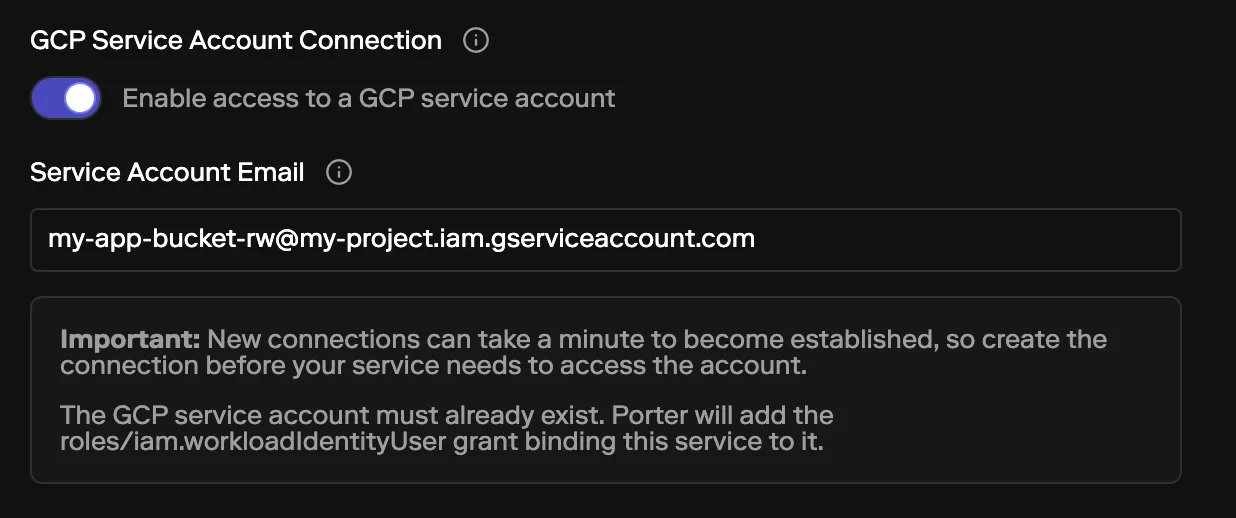
GOOGLE_APPLICATION_CREDENTIALS env var.
Configure as code (porter.yaml)
Configure as code (porter.yaml)
If you manage your app config as code, you can declare the same connection in See Connections in porter.yaml for the full schema.
porter.yaml:Enabling Workload Identity on a node group
When you turn on Workload Identity for a node group, GKE deploys a metadata server on those nodes that intercepts calls to the GCE metadata endpoint. Once enabled, pods can no longer reach the node’s default Compute Engine service account through that endpoint — they obtain Google credentials through a Workload Identity–bound Kubernetes service account instead. Before enabling it on a node group that already runs production traffic, confirm that none of its workloads depend on the default node service account. If you’re not sure, create a new node group with Workload Identity enabled and schedule your workloads on it to test before changing an existing node group.Related documentation
- Configuration as code — Overview of managing Porter apps via
porter.yaml - Connections in porter.yaml — Reference for all connection types, including the YAML schema
- AWS EKS Pod Identity — AWS documentation
- Azure Workload Identity — Azure documentation
- Application Default Credentials — GCP documentation